You will need to create a DMS Standard for each part number and process before any data can be entered. Before creating the standards, you should have already built a list of all your processes and associated defects. See DMS Processes for more information about this.
|
Contents [Hide] |
You can change or add to the list of DMS Standards using the Select Part Number dialog that is accessible from either the:
GainSeeker Charts module
DMS Data Entry module
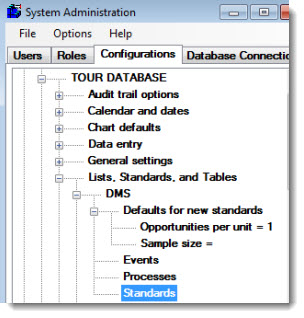
Navigate to the Standards setting on the Configurations tab following this path:
Configurations | (configuration name) | Lists, Standards, and Tables | DMS | Standards
Right-click the Standards setting to open the Select Part Number dialog. See Building a list of standards below.
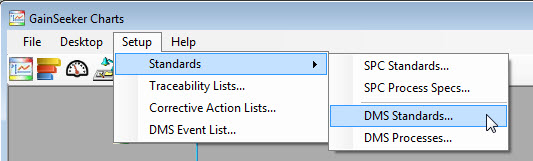
Click the Setup menu on the GainSeeker Charts window. Point to Standards and then click DMS Standards... on the submenu that displays.
The Select part Number dialog opens. See Building a list of standards below.
The Select Part Number dialog. See Building a list of standards below.

The New Part Number dialog opens.
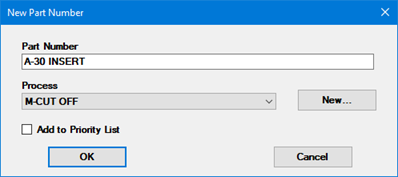
In the Part Number text field, enter a name for a part number. (If you are creating standards with similar settings, you can use the Duplicate... button and change the standard name.)
In the Process text field, use the drop-down arrow to select a process to associate with that part number.
Select the Add to priority lists(s) checkbox to add the standard to the priority list for this user.
Click OK.
The Standard Information dialog opens. Use this to record information about the standard for this part number and process. For information about the default settings used to create a new DMS standard, see Defaults for new DMS standards.
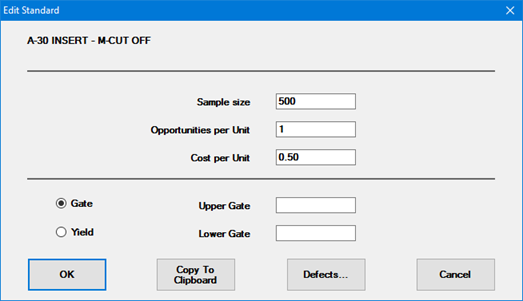
This window will look slightly different in Legacy modules such as DMS Data Entry and DMS Charts and Reports.
Sample size. Affects how operators will enter data for this part.
If the Sample size for this part number and process is constant (for example, always 3) enter the sample size number here. Then, each time the operator enters data for this standard, DMS will prefill the Sample size box on the data entry screen with this value.
If you set the Sample size to 0, most likely because your sample size tends to varies, the data entry operator must fill in the Sample size box on the data entry screen each time they enter data for this part and process.
If you set the Sample size to NONE or just leave this text box blank, GainSeeker does not automatically reset the Sample size box on the data entry screen when the operator changes to this part and process or saves a data record.
Opportunities per Unit. You can replace the GainSeeker default value (1) with the number of opportunities for error for this part. This value is important for calculating certain statistical values based on the number of opportunities. For more information, see Calculate Defects per opportunities instead of total Units.
Cost per unit. This is the cost of the unit (for the part number, a bolt, for example). If you want to implement the cost capabilities to track cost by part number, enter the Cost per Unit in the text field. You can also track the cost per defect, that is, what each defect associated with a unit cost. For information, see Implementing defect cost capabilities. A third option for cost tracking is to store actual costs in the data record as a traceability value. For more information, see Using the Traceability column for cost information.
Once
you have collected enough data to establish control limits, you
can enter Upper Gate and
Lower Gate values. These
values are used for displaying gate limits on Control charts.
They are also used for real-time checking during data entry the
legacy DMS Data Entry module or in the SPC Data Entry module.
(For DMS real-time checks via an Inspection or Python script,
use the Python command datadms.hadgatefailures.)
Gate values should be calculated differently for the different
data types. P and U data types use proportions;
NP and C data types use counts. For example, if your Sample Size is 100 and you want
your gate at a 15% failure rate, you would enter a gate of .15
for P and U data. You would enter 15 for NP and C data.
When displaying gates on control charts, the values are automatically
converted if you are displaying the data as Percentage or DPM
instead of Proportion.
Entering Gate limits does not affect how GainSeeker calculates
and reports Control Limits throughout the system. If you need
to configure GainSeeker to use historical control limits instead
of calculated control limits, see Using
Gate limits for Historical Control limits.
Alternately, you can click Yield and set a Goal Yield % and/or Acceptable Yield % . These can be displayed as yield goal lines on DPU Yield charts and reported with statistics. They can also be converted to DPU limits and displayed as limit lines on DPU charts.
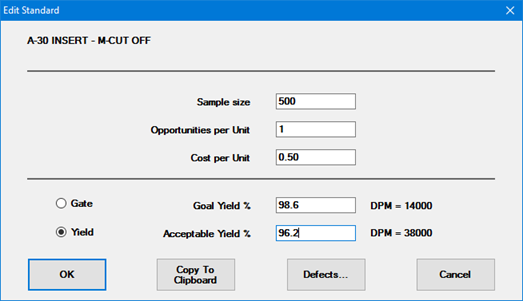
 Note:
You cannot use legacy DMS Data Entry module or DMS Charts
and Reports modules to enter these Yield Goal values or to
edit a DMS standard that has a Goal
Yield % or Acceptable
Yield % set.
Note:
You cannot use legacy DMS Data Entry module or DMS Charts
and Reports modules to enter these Yield Goal values or to
edit a DMS standard that has a Goal
Yield % or Acceptable
Yield % set.
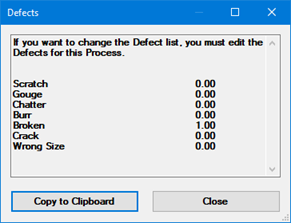
To view the list of defects associated with a standard, click the Defects button on the Edit Standard dialog.
The Defects dialog opens, listing the defects and any defect costs associated with the selected standard. You can change the associated defects and costs using a different dialog. See Assigning specific defects for more information.
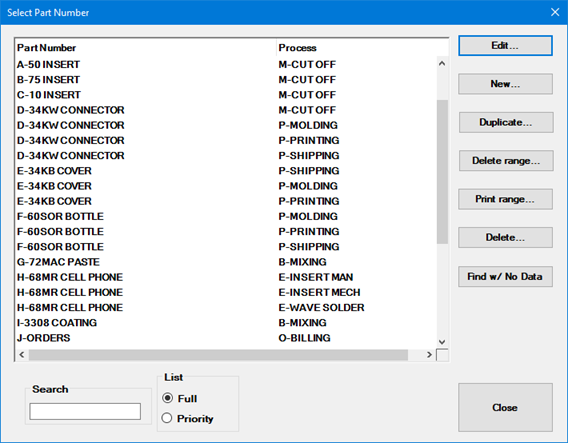
The Print range button on the Select Part Number dialog allows you to print records for standards you select. You can print to a text file that is opened in your text editor (typically Windows NotePad).
Click Print range... on the Select Part Number dialog.
The Print Range of Standard Records dialog opens.
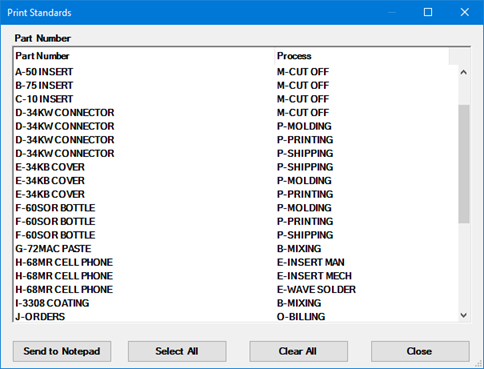
Click a standard name to select it or click multiple standards. For help selecting multiple standards, see Finding and selecting standards.
Then click Print to Notepad.
The Delete range button on the Select Part Number dialog allows you to delete one or more standards and the data records associated with selected standards, or you can opt to delete only the existing records for standards you select.
If you discontinue some part numbers or stop collecting data for them at some processes, and if you routinely archive and delete old data from your database, you may eventually have standards for which there is no data. You can remove these unnecessary standards from GainSeeker.
On the Select Part Number window, click Find w/ No Data.
This displays a list of DMS standards for which there are no data records.
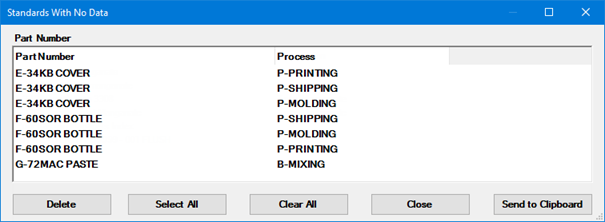
To copy this list of standards to clipboard, click Send to Clipboard.
Select the individual standards you want to delete, or click Select All to select them all.
To delete the selected standards, click Delete.