 Note:
Markers settings and all other
settings located in the Chart overrides
node of the Settings dialog can
be saved as a chart skin that you can apply to any charts. For more information,
see Chart Skins
Note:
Markers settings and all other
settings located in the Chart overrides
node of the Settings dialog can
be saved as a chart skin that you can apply to any charts. For more information,
see Chart SkinsUse the Markers node on the Settings tab to temporarily set the options for the markers on a chart. Markers are symbols or shapes on a chart that flag specific events, such as an operator note or a data point that is out of control. You can change the shape, size, and color of each symbol.
System administrators can assign default settings to charts in the GainSeeker System Administration module. See Chart Defaults settings
|
Contents [Hide] |
Note:
Markers settings and all other
settings located in the Chart overrides
node of the Settings dialog can
be saved as a chart skin that you can apply to any charts. For more information,
see Chart Skins
To temporarily override the default settings for markers follow this path on the SPC Settings tab or the DMS Settings tab:
Chart overrides | Markers
To set the default settings for marker, administrators can follow this path on the GainSeeker Systems Administrator module:
Configurations tab | (Configuration) | Chart defaults | Shared (DMS and SPC) | Markers
To display a symbol for each data point, select this check box.
To only show the lines that connect data points, clear this check box.
When a chart contains many events, causes, and/or actions taken, the short labels above these markers may overwrite each other and become illegible.
To hide these short labels above markers on the chart, select this check box.
To display these labels, clear this check box.
Each failure note, operator note, event, cause, and action taken displays a distinctive marker (symbol) on a Control chart. You can change the priority in which markers display when a single data point exhibits more that one of these markers.
For details, see Marker priority.
Set the color, type (shape), and the width of the marker symbols on the chart.
The Marker color, Marker type (shape), and Marker width options for each of the marker types are the same.
Following is an example of a chart on which the Failure note markers have been changed to purple, the solid diamond shape, and widened to 10:


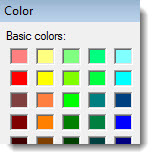
Marker color =
Double-click Marker color = to open the Color dialog. Click a color to select it.
Marker type =
Double-click Marker type = to open the Data Pattern dialog. Click a pattern to select it.

Marker width =
Double-click Marker width = to open the Enter Value dialog. Enter a numeric value in the Marker width text box that represents the width of the marker.
