On the Limits tab, you can enter specification limits, historical control limits, other limits for the standard. A visual display of these limits helps to ensure that they are entered correctly.
|
|
The following information is entered on the Limits tab:
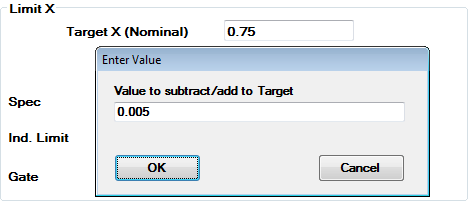
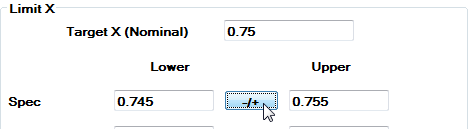
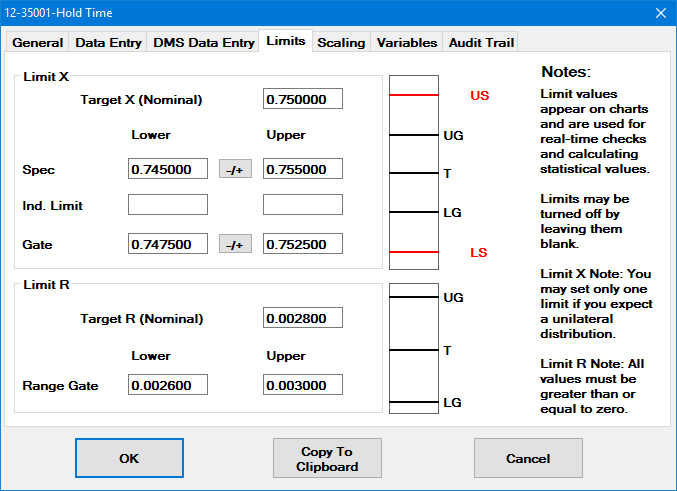
Target X (Nominal)
The target value from your blueprint for this characteristic of this part number.
For example, if your print tolerance for a characteristic is 0.75 +/- 0.005, then your target X (nominal) is 0.75.
Upper spec, Lower spec
The upper and lower specification limits from your blueprint for this characteristic of this part number.
For example, if your print tolerance for a characteristic is 0.75 +/- 0.005, then your upper spec is 0.755 and your lower spec is 0.745.
|
If you have only one specification limit (also called a one-sided or unilateral tolerance), enter the limit you have and leave the other limit blank. You should only enter 0 if one of your specification limits really is 0, because any specification limit you enter – including 0 – is used to calculate statistics such as Cpk.
Upper individual limit, Lower individual limit
Upper and lower limits (other than specification limits) for individual data values within a data subgroup.
Upper gate, Lower gate
Upper and lower limits for each data subgroup. This is often used to record and display historical control limits for this characteristic - similar to drawing control limits on a paper chart before you begin to collect data.
Entering Gate limits does not affect how GainSeeker calculates and reports Control Limits throughout the system. If you need to configure GainSeeker to use historical control limits instead of calculated control limits, see Using Gate limits for Historical Control limits.
You only need to set this value if you plan to analyze this standard with the Range/Short Run method of Short Run statistics.
To set the Target R, enter the expected range of measurements for this standard. For example, if measurements on a 2-inch part usually yield 2 inches plus or minus 0.04 inches, then your Target R should be 0.08 inches.
The historical control limits for the ranges for this characteristic. Setting range gates is similar to drawing control limits for the ranges on a paper chart before you begin to collect data.
 See
the Tip above for letting GainSeeker
calculate these limits if they are the same distance from the Target
R.
See
the Tip above for letting GainSeeker
calculate these limits if they are the same distance from the Target
R.
Information on changing the visual display: